How Do I Run a Virus Scan on Windows 10?
Windows 10 offers built-in Windows Security, which provides
the latest antivirus protection. It works silently in the background and starts
protecting your device from the moment you start Windows 10. Window Security scans for malware, viruses,
and security threats (malicious software) 24x7.
Additionally, Windows also download updates by default in
order to keep your device safe and protect it from threats.
Tip:
If you run Windows 10 in S mode, some features will be slightly different. The Virus & threat protection area has fewer options because this mode is streamlined for tighter security. But don't worry—the built-in security of this mode prevents viruses and other threats from running on your device, and you'll automatically receive security updates
Best Way to Remove Virus- Use Waredot Antivirus
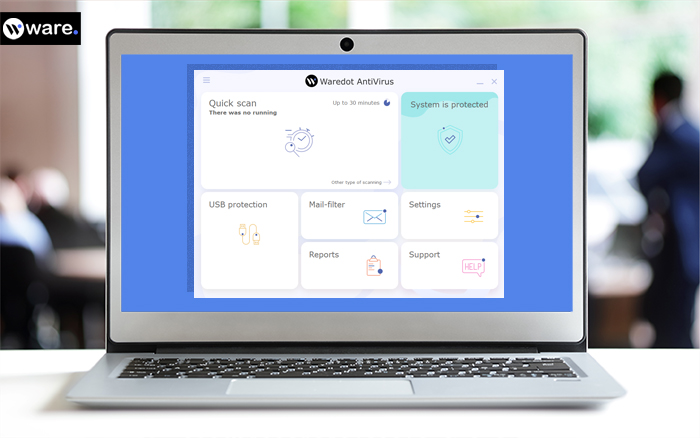
Waredot Antivirus is like the one solution for all problems. It means, using Waredot Antivirus software you can not only scan the viruses, get to know about them, you can remove them too. Make your pc virus free and accelerate the speed of your computer which got affected due to virus.
Download Free Waredot Antivirus
Change Window Security Features:
Windows Security offers the security features on Windows 10
and manages the tools that protect your device and your data. Understand the Windows Security features
easily and customize if you want.
You can find all these security features under Windows
Security Features. To access the, go to Start button>Settings>Update
& Security>Windows Security, And now “Choose the desired Option,”
Virus & Threat Protection
Manage the latest threats to your device, run scans, and get
latest updates to help find the latest threats on Windows 10.
Note: if you’re running Windows 10, some of these options
are unavailable.
Account &
Protection
Sign in with the account & protection on account
settings for Windows Hello & dynamic lock.
Firewall & Internet Protection
Lead the firewall settings and monitor what’s happening with
your network and internet connections.
Manage Browser and Application
Manage the browser activity and
application on Windows 10 by updating settings for Microsoft Defender Smart
Screen. Doing so will also protect your device against dangerous apps, files,
websites, and newly downloads. You will have to exploit protection and if you
want you can customize protection settings for your devices.
Security Options
Check time-to-time for the built-in
security options to protect your device from viruses.
Performance Analysis
Check the status info about your device’s performance health, and keep your device clean and up to date with the latest version of Windows 10.
Tip:
Windows
also help you to keep track of your kid’s online activity and the devices in
your household in the “Family Options.” If you want to open the Family Option:
click on the Window Start button and select Settings.
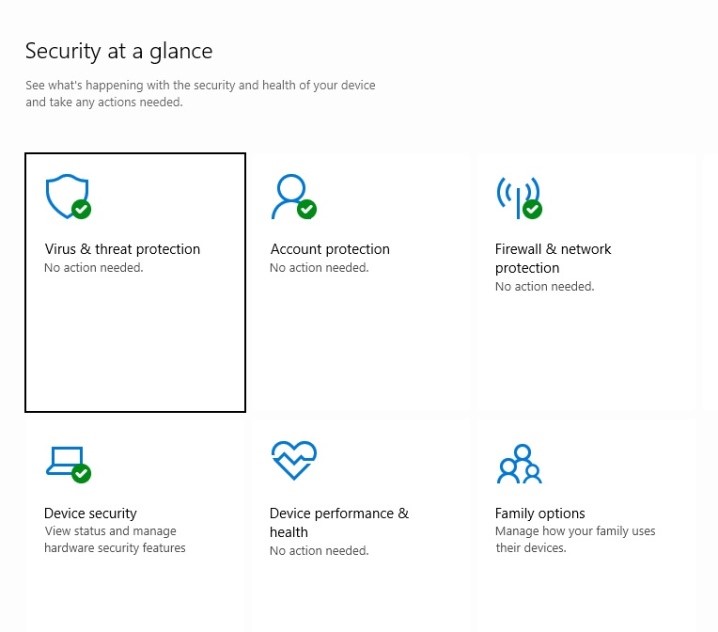
3 icon that indicate level of safety on Windows 10
- Green means your device is sufficiently protected and there aren’t any recommended actions.
- Yellow means there is a safety recommendation for you.
- Red is a warning that something needs your immediate attention.
How do I run a virus scan on Windows 10?
Windows Microsoft Defender is the best to scan any
individual file or folder and remove the virus from them. If you’re sure one of
your files or folders infected with virus or malware, just find the file or
folder in File Explorer, and then select the “Scan with Microsoft Defender.”
If you suspect there’s malware or a virus on your device,
you should immediately run a quick scan rather than a full scan. Quick scan is
much faster than running a full scan on all your files and folders.
Make sure you already enable the Window Defender on Windows 10. If you don’t know how to do so, enable Windows Defender by following below steps:
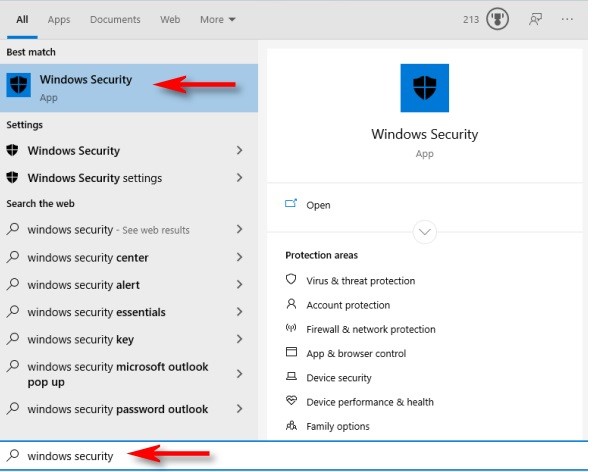
- Type Window Security in the search right of the Windows logo on the computer screen.
- Once the Windows security opens, check if any antivirus program has been installed and running on your computer.
- Now, click on Virus & Threat protection and next select Virus & Threat protection icon.
- Finally, Turn on Windows Defender for Real-Time Protection.
How to Run a Full Scan in Windows Security
To run a full scan in Windows Security on Windows 10 follows
the below steps:
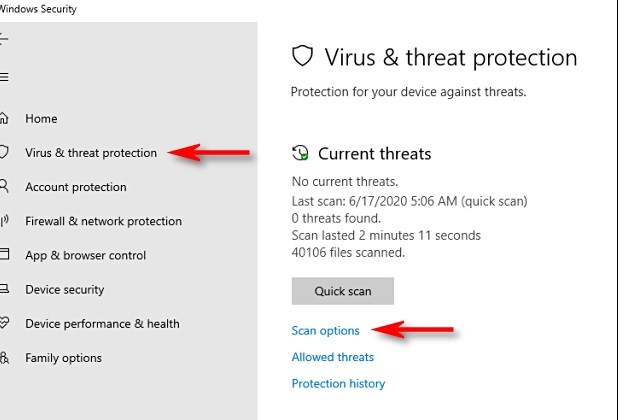
1. Type Window Security in the search right of the Windows logo on the computer screen. “Window Security” app icon that pops up.

2. Now, click on Virus & Threat protection and next select the Virus & Threat protection icon.
3. Now, you can find the “Scan Options,” below “Current Threats.” Click on the Scan option, doing so will appear the four different scan options for you.
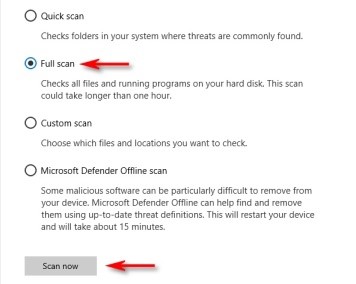
- Quick Scan
- Full Scan
- Custom Scan
- Microsoft Defender Offline Scan
- If you’re doing it for the first time and casually want to examine the complete system, then Full Scan option might be good for you. Select the radio button beside” Full Scan” and click on the “Scan Now” button.
4. This will start the scanning for the complete system, and
Window Security will show you the progress indicate a bar.
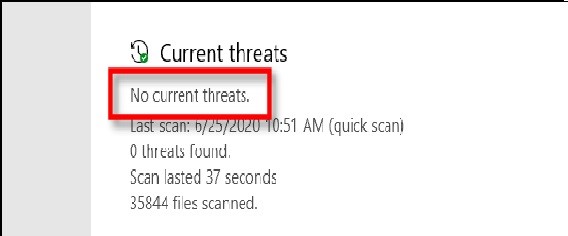
5. When the scan will complete, it will show you the results. If everything was okay, it may prompt you with the text “No current threats.”
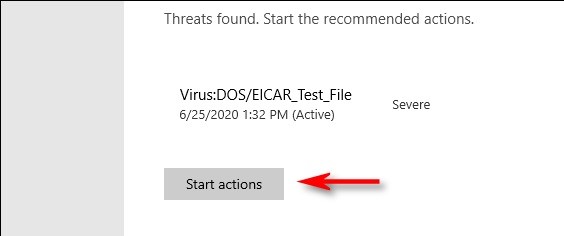
6. And, if Microsoft Defender finds some threats, you will
see a message that says “ Threats Found” and a list of the infected files just
below.
7. Finally, to remove the threats from your pc, click the “Start Actions” button. Now, Microsoft Defender will remove the threats. If you want to check the results or which threats were found on the device, go beneath the scan results and click “Protection History.”

Tip:
When you’re sure there’s a virus or malware on your device or in specific file or folder, a quick scan can immediately can be the best option rather than a full scan. As we already said, Quick Scan is much faster than Full Scan.
How to Run a Full Scan in Windows Security
Running a quick scan is as same as you run the full scan on
the system.
Type Window Security in the search right of the Windows logo on the computer screen. “Window Security” app icon that pops up.
Now, click on Virus & Threat protection and next select Virus & Threat protection icon.
Now, you can find the “Scan Options,” below “Current Threats.” Click on the Scan option, doing so will appear the four different scan options for you.
- Quick Scan
- Full Scan
- Custom Scan
- Microsoft Defender Offline Scan
Now, select the Quick Scan from the list. Now, Microsoft Defender will start the scanning.
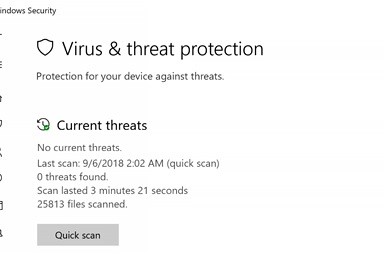
When the scan will complete, it will show you the results. If everything was okay, it may prompt you with the text “No current threats.”

And, if Microsoft Defender finds some threats, you will see a message that says “ Threats Found” and a list of the infected files just below.
Finally, to remove the threats from your pc, click the “Start Actions” button. Now, Microsoft Defender will remove the threats. If you want to check the results or which the threats were found on the device, go beneath the scan results and click “Protection History.”
Likely, you can choose the other option if you want to check your device more thoroughly.
- Custom Scan
- Microsoft Defender Offline Scan
Note: Windows Defender cannot be enabled when another anti-virus is installed.
How to Schedule a Scan on Windows 10
Windows Security regularly scans your device to keep it
secure, and if you want you can also schedule when and how often the scans
occur.
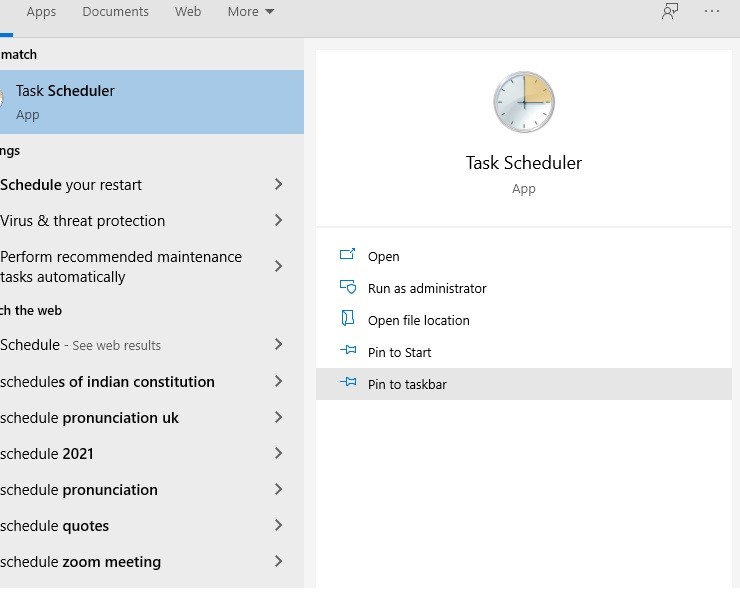
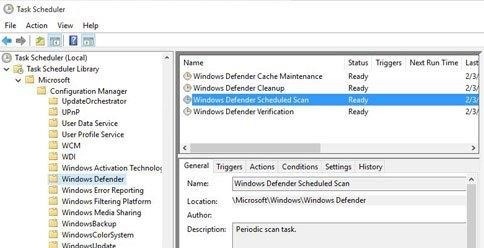
1. First of all, select the Start button, and type the Schedule tasks in the Search box, and in the list of results, and select Task Scheduler.
2. Now, select the arrow next to Task Scheduler Library to
expand it, click on the Microsoft>Windows and then scroll down and select
the Windows Defender folder.
3. In the top-center pane, select Windows Defender Scheduled Scan. Go to the Actions pane on the right, and scroll down and then select Properties.
4. In the Windows that opens, select the Triggers tab, and
then select New. Set your preferred time
and frequency, and then select OK.
If you want you can also review the schedule and select Ok.
How to run an AVG virus scan on Windows 10
AVG Internet Security and AVG Antivirus Free provides a
range of scans to protect your PC from viruses and malware. Learn how to scan a
pc using AVG antivirus.
1. First of all, Download and install the AVG antivirus software on Windows 10. Once you download it, Click the Windows Start button. Type the name of your AVG in the search bar. Click on the AVG software.
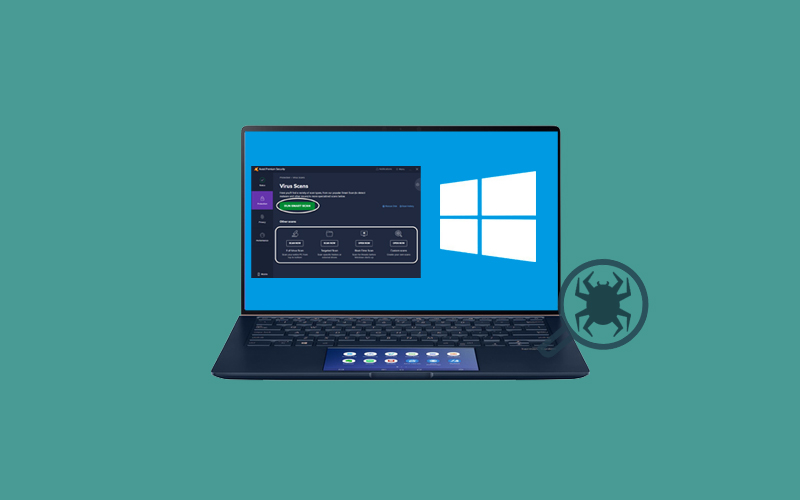
2. Doing so will open the AVG user interface. Now, you can run a Smart Scan from the main application screen by clicking Run Smart Scan. Alternatively, to run a specialized scan.
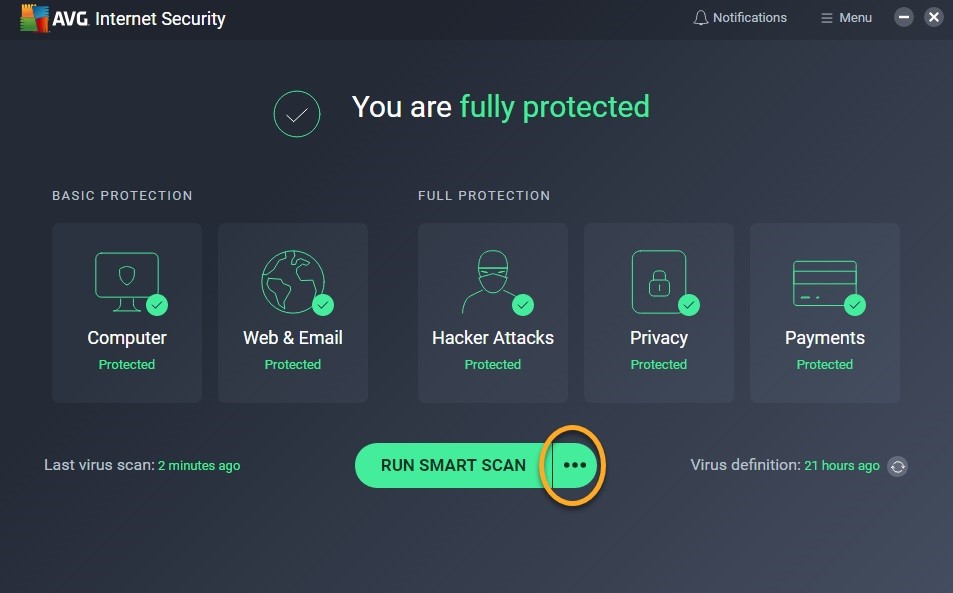
3. Click the icon (three dots) next to Run Smart Scan. Now, select a specialized scan from the list
the appears.
Note: Scanning time may depend on the scan type and the amount of data to analyze. To cancel the scan, click Stop Scan.
Understand the following scan typed offered by AVG Internet Security and AVG Antivirus FREE.
Smart Scan
Scan the complete system on Windows 10 for viruses, malware, bad browser add-ons, and other issues.
Deep Scan
It manages the in-depth scan of your system that checks your storage drives and memory for malware.
File or Folder Scan
If you find virus or malware in file or folder, you can select this type. You can also scan a specific folder by right-clicking on the folder in File Explorer and selecting Scan selected items for viruses.
Boot-Time Scan
Running a Boot-Time Scan during the startup removes the
chances of detecting and removing malware before it can attack your pc.
USB/DVD Scan
Run a scan for all removable media that is currently attached
to your PC, such as USB flash drives and external hard drives.
Performance Scan
You can scan your system for useless data and other issues that may affect the speed and security of your PC. To resolve any issues that are detected, you should first install AVG TuneUp.
How to Create a Custom Scan on Windows 10
To create a custom scan on Windows 10, follow the below
steps.
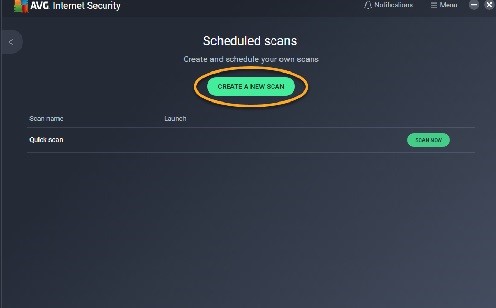
1. Click the Windows Start button. Type the name of your AVG in the search bar. Click on the AVG software. Doing so will open the AVG user interface. Now, click on the three dots next to Run Smart Scan, and select Schedules Scans.

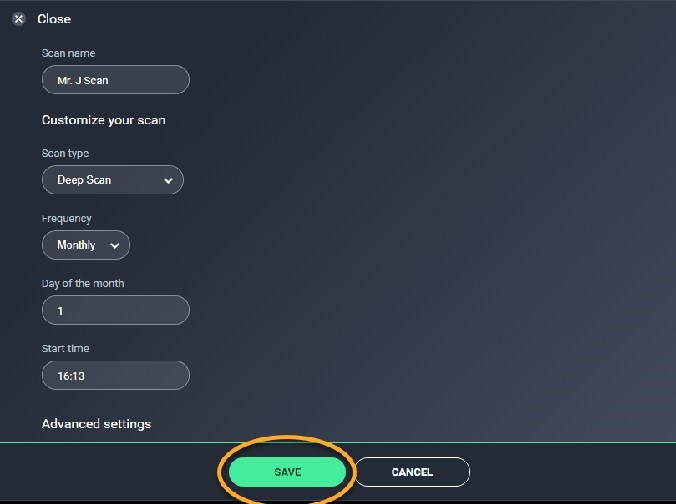
2.Click Create a New Scan and enter the Scan Name that will allow you to easily identify the scan, then use the drop-down menu to define the Scan Type.
3. Select how often the scan will automatically run in the “Frequency” section. If you don’t want the automatic scan, click on Never.
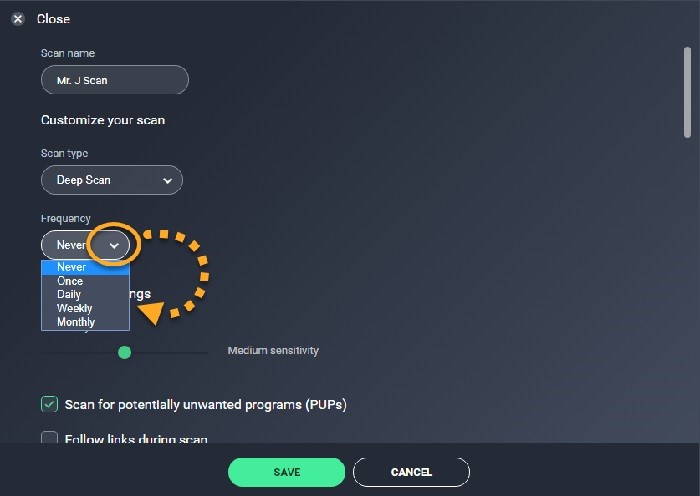
4. If you choose scan automatically, you need to specify the exact time for when the scan will run by entering a Start Time in the provided field.
5. It depends on the scan Frequency, you may need to specify the Day of the Week or the Day of the Month that the scan runs.
6.Once you’re done with scheduling a scan, hit the Save button to save the Schedules Scan.
The new custom scan appears on your list of Schedules Scans. The following options are available for all the listed scans.
Modify scan settings
by hovering your cursor over the relevant panel and clicking the... icon (three
dots) that appears. Choose Settings.
Delete a scan:
Hover your cursor over the relevant panel and click the … icon (three dots)
that appears. Select Delete.
Run a scan: Click Scan Now next to the scan you want to run.
Summary
Hey guys! This was the guide about “How do I run a virus
scan on Windows 10.” The window offers
the best security features-Windows Defender that will protect your computer
from the latest threats. Explore more new things and security tools offered by
Windows Security features to keep your device virus or malware-free.
If you have any queries regarding this article, please let us know in the comment section. We would glad to answer you!

Secure You PC Now With Award Winning Security.
Protects your PC from viruses, spyware, Trojans and other malicious programs.
 FREE DOWNLOAD
Available in Windows 11, 10, 8, 7, Vista, XP