How to remove password from excel
Add or Remove password from excel in few clicks
Are you struggling with your excel password again and again? Then, remove the password from the excel file. Removing password from the excel file is as easy as you set up password. Still, make sure when you remove the password from the excel file then anyone can see, copy, can do lot more things with your excel file. Basically, your excel data will come in danger.
This article will tell you all the required things for the excel sheet password, including how to add password in excel.
How to Add Password to Excel-Windows
Here’s how to add password to your excel worksheet on Windows.
1. First of all, open the Excel spreadsheet you want to password protected and then click on the “File” tab close to the Home button at the top.
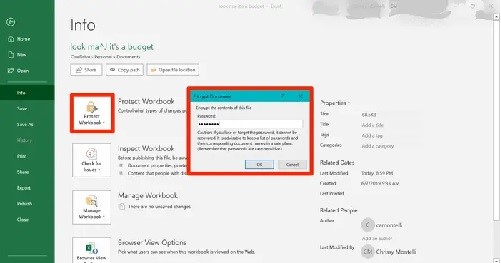
2. Clicking on the “File” tab will appear the option for you. Select “Info” from there. Doing so will appear the dialog box on the screen.
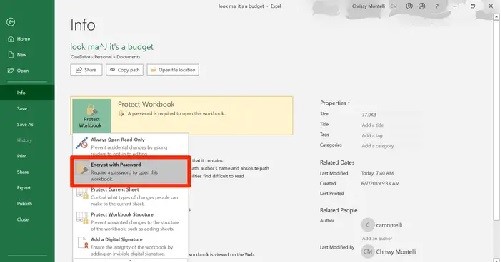
3. Now, click on the box labeled “Protect Workbook” to open a drop-down menu. Then, click on the “Encrypt with password” on the drop-down menu.
4. On the dialog box that appears, you can enter the password that you want to use and click Ok. Again enter the password in the “reenter password” section to confirm your password and click Ok again.
5. Now, if anyone needs to open your password-protected excel file, they need to enter the password. They can enter the password two times only, if the person entered the wrong password two times, then the excel file won’t open and you will not get a third chance to try the password again.
How to Add Password to Excel-Mac
Here’s how to add password to your excel worksheet on mac.
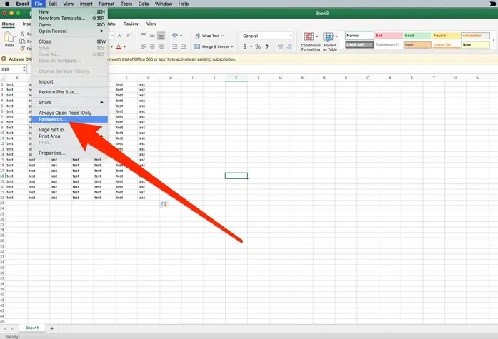
1. First of all, open the Excel spreadsheet you want to password protected and then click on the “File” tab in the menu bar at the top of the screen.
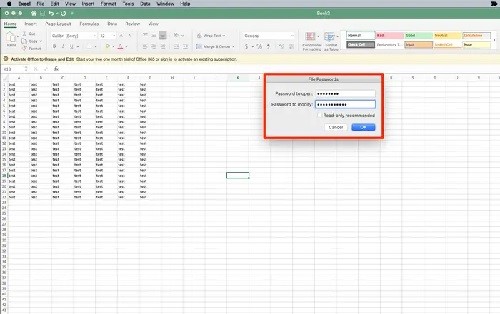
2. Now, click “Password.” You’ll be asked to set a password for opening the file, and another password for editing it. You can set the password for either.
3. Once you click “Ok,” you’ll be asked to re-enter your password to confirm your password. Once you done, click Ok. Make sure the password you choose to protect your excel file is something that no one can easily guess and also ensure you can remember it as well, or you can write it down in a safe place- there’s no password recovery option if you forget it.
4. Your excel file has been password protected now. You will be required to type in your password whenever you want to open this particular excel spreadsheet.
How to Remove Password from Excel File on Windows
If you want to unprotect or remove password from your excel file, here’s how to do it.
1. First of all, open your encrypted Excel spreadsheet, and type in the password, and click Ok.
2. Now, click on the “File” tab, and then click on “Info.”
3. Click on the box labeled “Protect Workbook” to open a drop-down menu. Then, click on “Encrypt with password” on the drop-down menu.
4. Finally, delete the password that appears, so that the field is blank and click Ok. You’re done now.
How to Remove Password from Excel File on Mac
If you want to unprotect or remove password from your excel file, here’s how to do it.
1. First of all, open your encrypted Excel file on your mac.
2. Click on the “File” in your menu bar at the top of the screen.
3. Now, click on “Password.” You’ll be presented with the same menu that you chose your password in. Clear box text fields, and click Ok.
4. Your Excel spreadsheet should no longer be password protected.
How to Unprotect an Excel File
In this section, we will tell you how to unprotect an excel file. Remember this method assumes that as the owner of the file, you remember the password used to protect the spreadsheet.
1. First of all, open the protect excel spreadsheet, and select “Review>Unprotect Sheet.” You could also right click on the protect spreadsheet, and then select “Unprotect Sheet.”
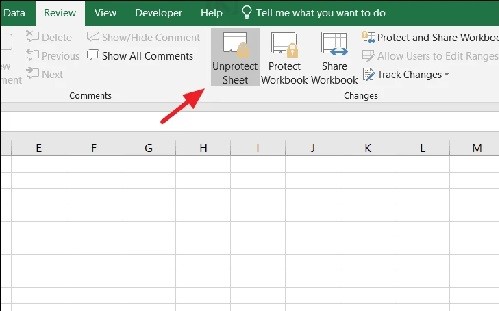
2. Now, you can identify a protected spreadsheet under the Changes section of the Review tab on the ribbon. If your sheet is already protected, you see the Unprotect Sheet option.
3. To unprotect the sheet, you need to enter the password used to protect the spreadsheet, and then click Ok. Your spreadsheet will not be unprotected and it can be modified.
How to Unprotect an Excel Worksheet if you’ve forget the password
If you’ve forget your excel password and now want to open it, here’s how to unprotect an excel workbook without knowing the password.
1. First of all, open the protected spreadsheet on your preferred device.
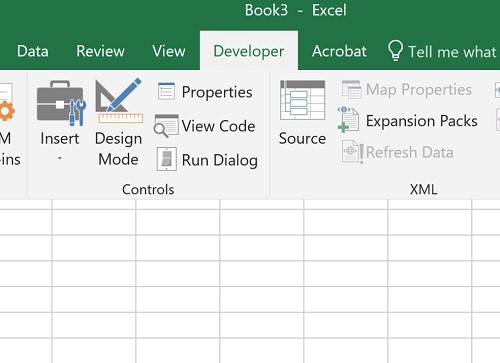
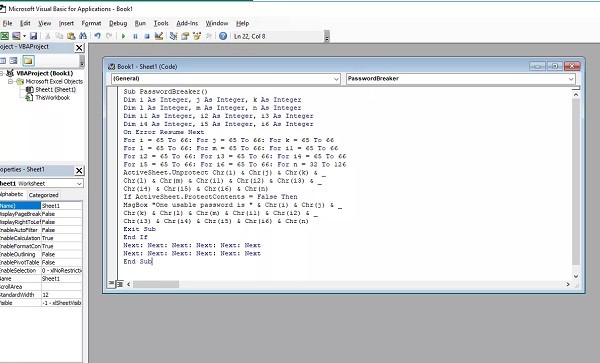
2. Access the Visual Basic code editor by either pressing Alt+F11 or choose “Developer>View Code.
3. Now, in the Code windows of the protected sheet, you need to enter the following code.
|
Sub PasswordBreaker() |
4. Select “Run” or press “F5” to execute the code. The code will take several minutes to run. Once finished, you’ll receive a pop-up with a password.
5. Now, select Ok and your spreadsheet will be unprotected.
How to Setup a Modify Password to Your Excel Worksheet
This is another great way to protect your excel file without interrupting so much for anyone. With this, you can password protect an excel worksheet and this will prevent people from making changes to it after it is open. It becomes read-only for anyone without the password.
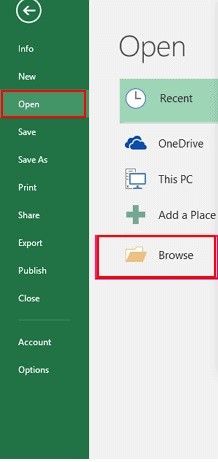
1.To do so, open your Worksheet and select File>Save As. Then, select “Browse” to open the file browser windows.
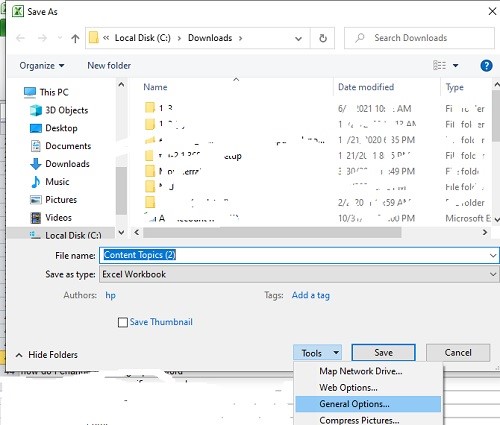
2.In the Save As window, you need to select “Tools” and choose “General Options” in the drop-down menu.
3. Now, in the General Options Windows, type a password into the “Password to modify” field.
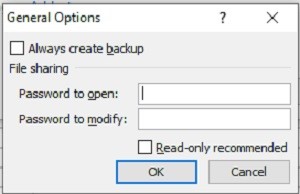
Note: If you want you can also enter a password into the Password to open field, which would require a password to open the workbook at all. This works just like the Info password protection described above.
4. Now, you’re prompted to re-enter the password beneath “Reenter password to modify” to make sure you didn’t type it incorrectly.
5. Finally, select Ok to close the confirmation windows and save.
Now, when anyone opens this workbook, they will need to enter the correct password to modify the workbook, or they can select “Read Only” to open the workbook in read-only mode.
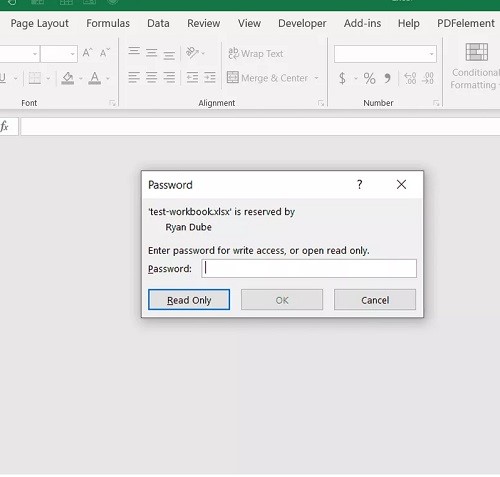
Note: To remove the modified password from your protect worksheet, just follow the same procedure as above, but clear the password field and select Ok.
Encrypting or Password Protection is enough?
You should not assume that just because a workbook or worksheet is password-protected that it is secure - you should always think twice before distributing Excel workbooks that may contain sensitive personal information such as credit card numbers, Social Security numbers, and employee identification, to name a few.
If you want to secure your excel files from the online hacking or threats, you should keep yourself at one step ahead from the hackers or spammers. If you want to do so, use Waredot Antivirus to secure your excel files on your system. Download the software from the below link and secure your files with DIY facility.
Additional Security Option to Protect Your Excel File
Securing your excel file with a password is the best option and if you already did it but still feel insecure about your data in the excel worksheet, then enable some additional security options in the excel file.
Excel offers more customized security options to our files. It’s important to know these options, which you can apply for the right security for your project. Under “Project Documents,” you’ll find several additional features that may prove useful.
Mark as Final
If you mark as final your excel file, it will mark the file as completed. It will lets other people know that they shouldn’t make any changed. Using this option will not secure the data behind a password, however, so it doesn’t offer any security.
Cover Your Current Sheet
This option will protect the currently selected worksheet with a password so that people cannot make any changed in the file. There’s also an option to do with this Workbook structure, which protects data throughout the workbook from changes unless people have the password.
Restrict Access
You can restrict access for someone to access Excel files. This feature will restrict the other person to access the file. For example, IT has made security templates that keep Excel files safe from particular users, the Restrict Access features backs up these settings.
Add a Digital Signature
Excel also allows you to add a digital signature in order to protect your data. You can guarantee that only you have access to and control over your Excel files by adding a unique and strong digital signature.
Workbook-level
With this feature, you can lock the structure of your workbook by setting up the password. When you lock your workbook structure, it prevents other users from adding, moving, deleting, hiding and renaming worksheets.
Worksheet-level
With sheet protection, if you want you can also limit a user on your excel file. You can control how a user can work within your worksheets. Excel also allows you to specify what exactly a user can do within a sheet, thereby making sure that none of the important data in your worksheet are affected.
For example, you can limit a user to add only rows in the excel sheet, then that the person you allowed to make changes to the specified limit will only be able to add rows only.
Note: Remember, Worksheet level protection is not intended as a security feature. It simply prevents users from changing or modifying locked cells in the worksheet.
How to Password Protect Excel Sheet Online
Due to any issues, if you aren’t able to password protect a sheet with excel built-in feature, you can use online websites to password protect your excel sheet online.
1. First of all, visit Protect Excel Online- clicking on this link will take on the website that will password protect your excel file.
2. Once the website page opens, click inside the file drop area to upload your Excel files. You can also drag & drop the excel file
3. Once you upload the file, enter the new desired password in “Password” input field to make your Excel file password protected.
4. Now, click on the Green button that says “Protect Now.” You will see the “Download Link” of password protected excel file on the screen.
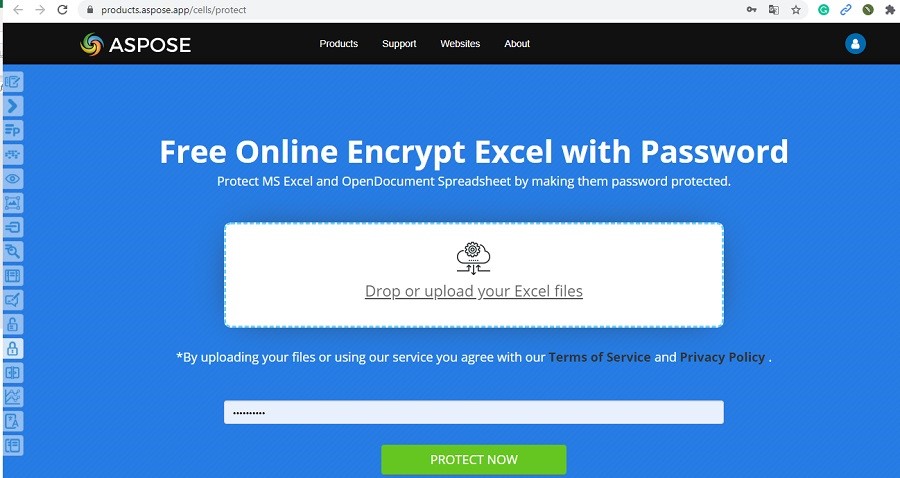
Note: if you want, you can also send a link to the Excel file to your email address
5. Click on the “Download link” and password protected file will download on your system. You can find your password protected file in the Download section.
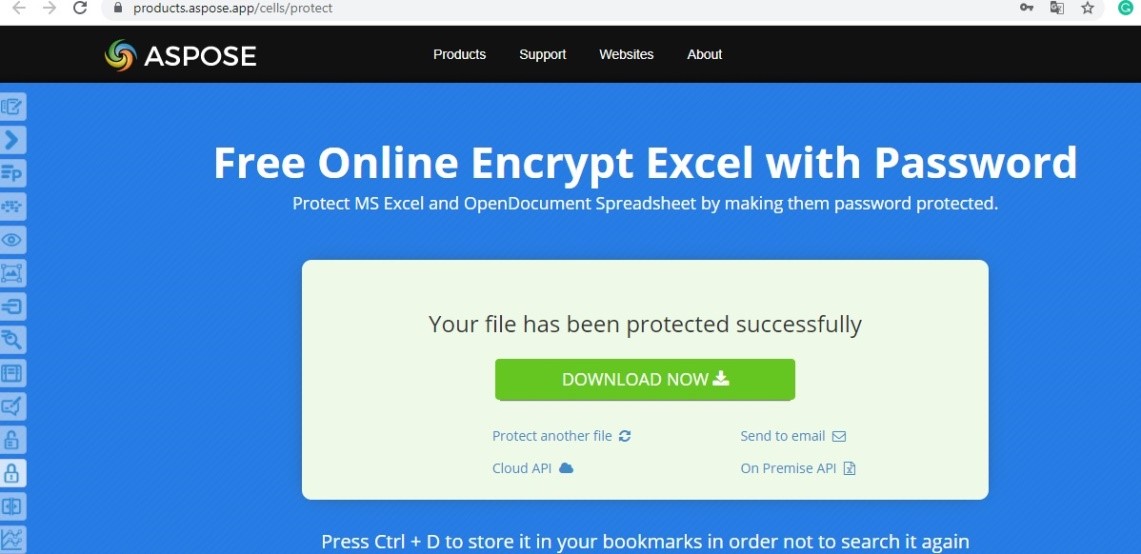
Note: This will not erase your existing file, it may that the existing file can be opened easily without the password. So once you password protect your file-check it and if all ok, delete the existing one.
6. This website claims that the file will get deleted from their servers after 24 hours and download link will also stop working after this time period.
Summary
Hey guys! This was the guide about “how to remove password from excel.” Here we’ve discussed few ways to password protect your excel file on windows and mac as well. With this, you can also find some exciting excel built-in features that also help you to prevent your file from unauthorized access and to limit a user.
Hope you find this article helpful and informative. If you’ve any queries regarding this article or want more stuff on excel security, please let us know in the comment section.
