How to Change Password on Chromebook
Don’t be confused between Google account password and Chromebook password, both are same! As you change your Google account the same way you can change your Chromebook password because you use a single password for all your Google-connected services and devices.
If you still don’t know how you can change your Chromebook password, then here’s how to change your Chromebook password using your Chromebook.
Before you go ahead, take a look at Waredot Antivirus that helps you to deal with many problem raised in this article. Waredot Antivirus is the perfect antivirus to secure your Chromebook and data. Follow the below link and download now.
Download Link: https://www.waredot.com/antivirus
How to Change Password on Chromebook
Here’s how to change password on Chromebook:
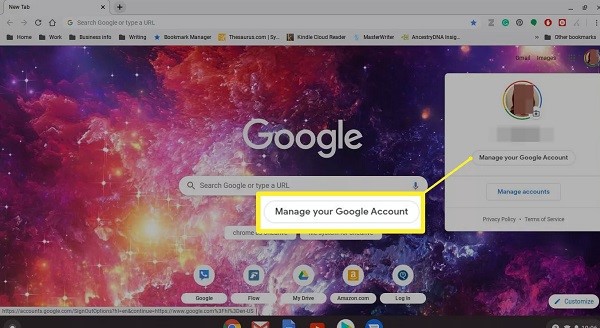
1. First of all, open Chrome and select your profile picture in the upper right corner of your screen. On the profile, you can find the picture if you’ve setup otherwise, you will find the first letter icon of the name of your Google account. For example, if your name is Elbert, then it will show E letter on the profile picture.
2. Now, select “Manage your Google account.” You can find this option below of your name.
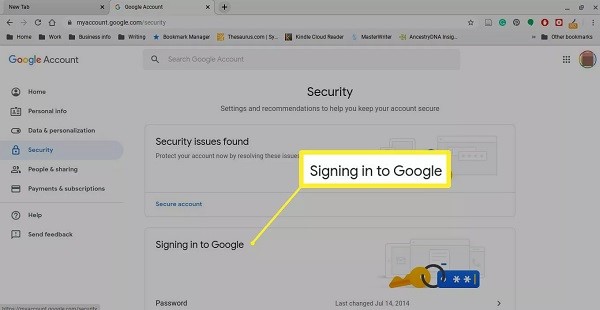
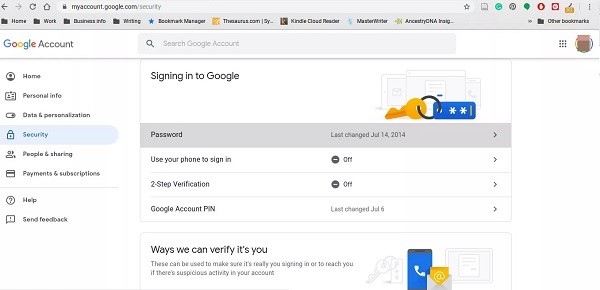
3. Now, on the left-hand side of the page, click on the tab that says “Security.”
4. Then, under “Signing in to Google,” you’ll see a tab that says “Password,” with information on the last time you changed your password next to it.
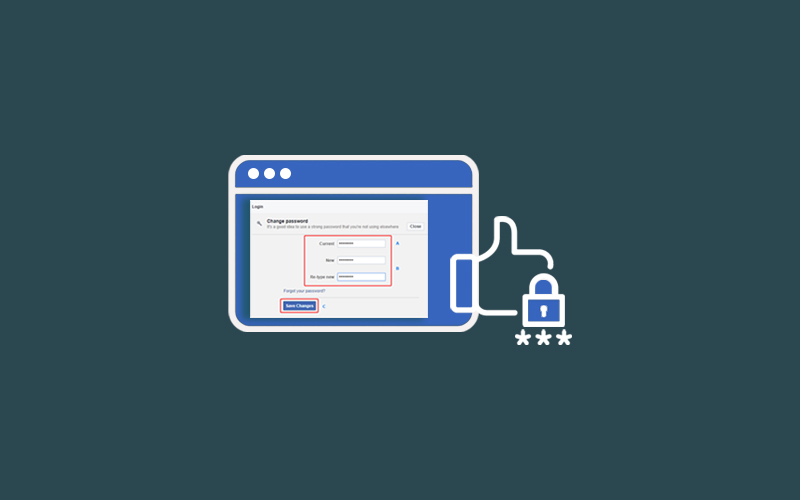
5. Now, click on “Password.” You’ll be prompted to enter your current password. Enter your current password and then select Next. Once you’ve entered your current password, you’ll be taken to a new screen.
6. Enter your new password twice in order to confirm its correct. Select “Change Password,” to save the changes you’ve made.
Note: Make sure that changing your Google password leads to getting affected for other Google areas too. It means you’ll likely need to change it in other Google services as well which is associated with the same Google account.
How to Change Your Chromebook Password without Your Chromebook
As we already said, your Chromebook password and Google password are the same. That’s why, if you changed your Google password with a device other than your Chromebook changes your Chromebook password, it will also impact the Chromebook.
When you use your Chromebook to change your password, the Chromebook automatically syncs with your Google account. Your new password will immediately get active. So, when you shut down the Chromebook and boot it back up, the new password will work.
How to Enable Two-Step Verification on Chromebook
Google’s two-factor authentication enhanced the security of your accounts. It’s good if you’ve already enabled it. Because when you turn it on, you provide your phone number and Google will sends a text messages with a code each time you log in to your Google account on a new device.
When someone tries to log in without the code, they won’t be given access to your account.
Additionally, Google also allows you to set up a prompt on your phone to verify new sign in attempts. You can also use the Google authentication app if you prefer.
1. First of all, open Chrome and select your profile picture in the upper right corner of your screen.
2. Now, select “Manage your Google account.” You can find this option below of your name.

3. Now, on the left-hand side of the page, click on the tab that says “Security.”
4. Scroll down to the “Signing in to Google” section. Select 2-Step Verification.
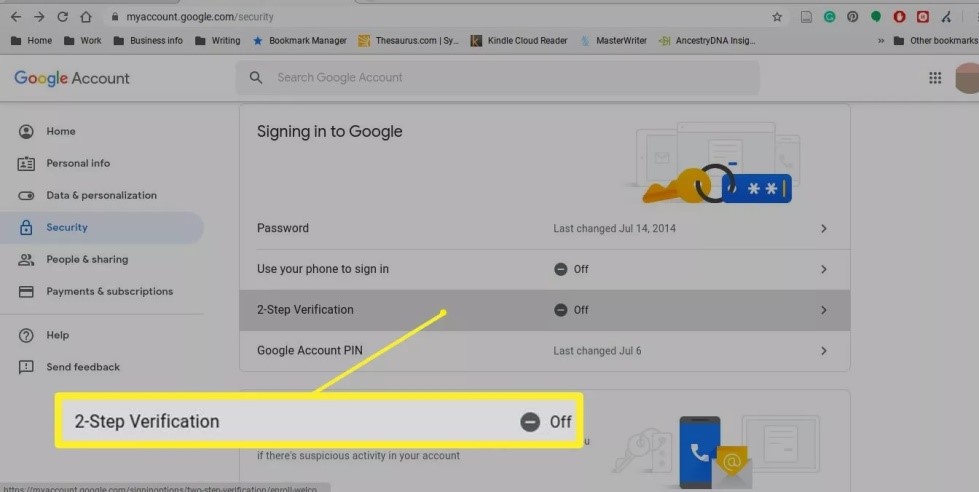
5. Now, scroll down and select “Get Started.” Now Enter your current password and select Next.
6. Now, you need to select the device to get the security prompts from Google. Or, choose another option and set up a “Security Key or get a “Text Messages or Voice Call.”
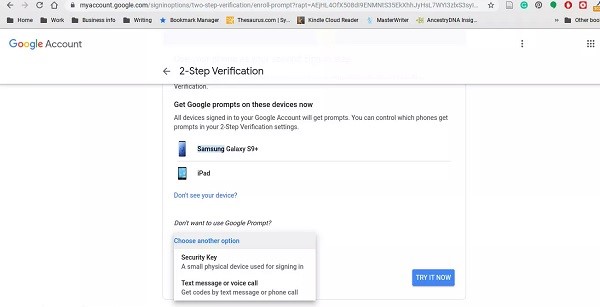
7. Select the Yes from the device you selected. Now, don’t forget to add a backup option by either entering a cellphone number or selecting “Use Another Backup Option” to use a backup code.
8. If you chose the Prompt option, a code will be send over your cellphone. Once you get the code on your phone, then enter the code and select Next.
Note: You can only use each code a single time.
9. Select “Turn On” to complete the process. If you enable backup codes, it’s really difficult to write down or print the codes. Make sure that these are codes you can use to bypass the text messages system if you lose access to your phone, so make sure you choose the right place to receive these codes.
How to Add a Pin to your Chromebook
Adding a Pin to your Chromebook created an additional shortcut to the app or services you use so that you can quickly move between your frequently used applications. Once you pin an application to your shelf, you can place your icon in the order that you wish easily by tapping and dragging icons left or right along the shelf. On some Chromebooks, you can also use your PIN instead of your Google Account password to sign in.
Here’s how to add a PIN to your Chromebook:
1.First of all, click on the “Time” tab in the bottom right corner of your screen and then select the gear icon. Doing so will open the new Window.
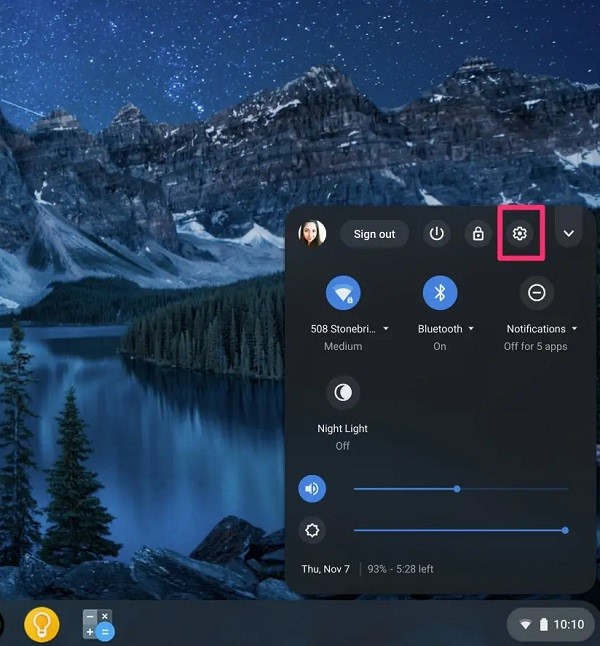
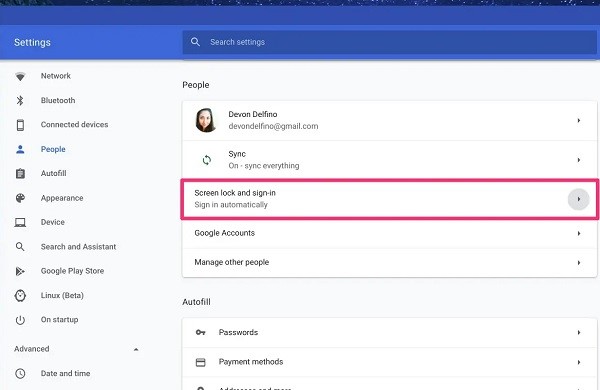
2. On the new windows, click “People” in the left sidebar of the Window.
3. Select “Screen locks and sign-in.” Enter your Google account password and click “Confirm.”
4. Now, choose your “PIN or Password” and then click “Set up PIN.” Make sure your entered desired PIN must be at least six digits long.
5. Once your PIN sets up, you can use this PIN to unlock your Chromebook from Sleep mode. But make sure that you may still have to enter your Google account password once every 24 hours if you use the PIN to get into your Chromebook.
6. If you want to run off the password, you can do it easily. Go to “Screen lock and sign-in” area of settings, and from here you can turn off the password requirement by toggling off the “Show lock screen when waking from sleep” option.
Access New Features on Chromebook
Today, Chromebook is not just a Chrome laptop, now it has become the most of your laptop. Google has been gradually adding new features to Chrome OS, like the ability to run Android apps and even Install Linux. To get the most of your Chromebook, we’ve put together the list of these new features you can use.
Note: These instructions apply to Chromebook running Chrome OS 53 and above.
Unlock Your Chromebook
Password or PIN code is your first weapon to unlock your Chromebook, but Google has also developed another option too: unlock your Chromebook with Android smartphone.
Yes, you can unlock your Chromebook from Android phone. Once set up, your Chromebook will automatically unlock when a paired phone is nearby and unlocked.
Remember, this features requires a phone running Android 5.0 or later with a lock screen, Bluetooth and Smart Lock enabled. Your Chromebook must also be running Chrome OS 40 or later and support Bluetooth.
Here’s how to unlock your Chromebook with an Android device:
1.First of all, click on the “Status area” at the bottom right of the screen.
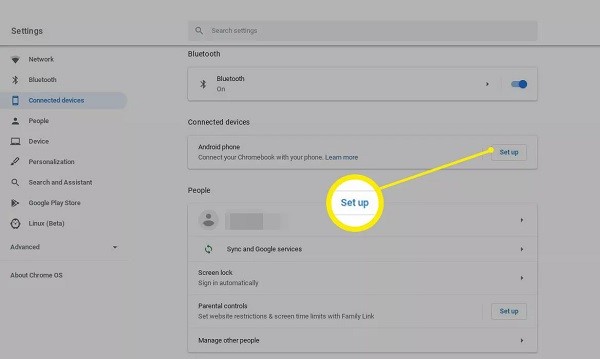
2. Now, select “Settings” icon > Select Connected Devices.”

3. Under Connected Devices, click on the “Set Up” option at the right side of the “Android phone” text. You need to make sure that you’re Bluetooth on your phone, then select your phone under the “Select a device dropdown.”
4. Select “Accept & Continue.” You’ll be asked to enter your Google password and select Done.
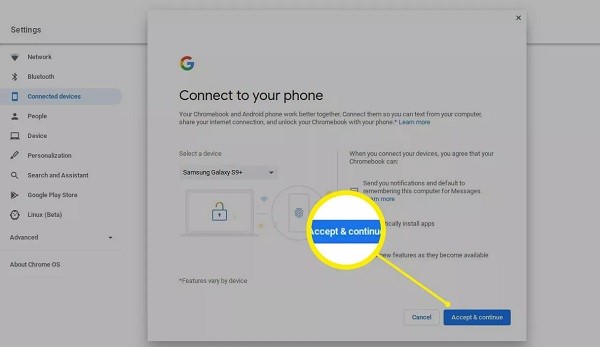
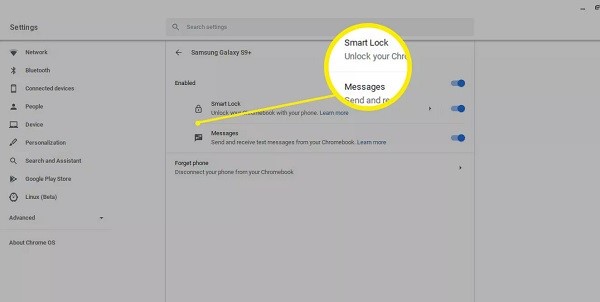
5. Now, select Done again to complete the setup. Select the newly added device and check the toggle next to “Disabled.”
6. Enter your password and click Confirm. Notice your Smart Lock should be enabled. Now you can select either option for further customization.
Install Android Apps direct from Google Play Store on Chromebook
In the previous years, Chromebook OS and Android had so many compatibility issues. But now, Google has made it easier for everyone by merging the two by adding Google Play Store and Android app support to a range of Chromebooks. Make sure that installed android apps integrate with Chrome OS, but functionality may differ by apps and device.
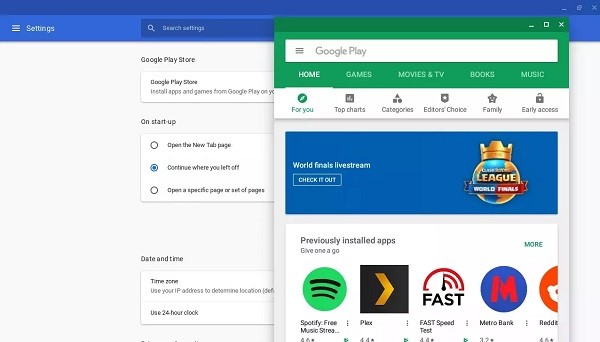
Not all Chromebooks support the Google Play Store and Android apps. Google maintains a list of all Supported Chromebooks.
- First of all, click on the “Status area” at the bottom right of the screen.
- Now, select the “Settings” icon > select Google Play Store and toggle it on.
- In the Windows that opens, select “More,” you can read the Terms of Service, then select “I Agree.”
- Now, browser the Google Play Store and install the apps you want to install on an android device.
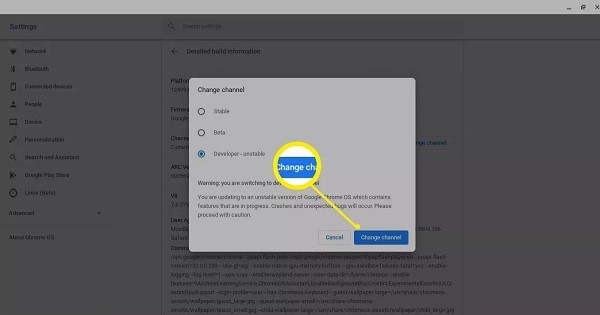
Use Beta or OS or Developer Channel for the Latest Updates
Because Chrome OS is based on the Chrome web browser, it receives frequent updates. Bug fixes, speed improvements, and new features are all included in the updates. Before rolling these out to all users, they test them in the Chrome OS Developer and Beta channels.
- First of all, click on the “Status area” at the bottom right of the screen.
- Now, select “Settings” icon. Under Settings, scroll to the bottom of the menu and click on “About Chrome OS.”
- You need to select now “Detailed build information.” Under “Channel, select the “Change Channel,” and then finally select either Beta or Developer.
- Note: Choose Beta or Developer in Unstable or select Stable by visiting the original setting menu.
- Finally, hit ‘Change Channel” to confirm your choice.
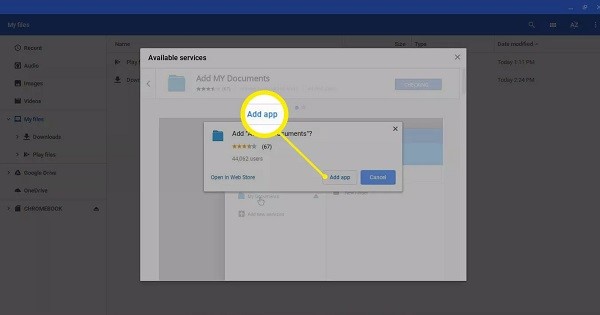
Link Cloud Services
Chromebook users always had a problem with low storage capacity. However, the integration with Google Drive means you can access your Drive storage directly from the Files app. Additionally, there’s a way to enable this integration for other cloud storage services too.
- To start, navigate to the Shelf and open Files. From here, select the “three dots” at the top right of the Windows, then select “Add New service.”
- Select “Install new service.” Here, only supported services will be shown in pop-up windows. When you locate your chosen service, select Install.
- If the prompt appears, select Add app. The newly installed service will open. Now, follow the on-screen prompts to configure the service.
Powerwash your Chromebook
On Chromebook, if you’re having any trouble in performance or your Chromebook working slow, then you can reset your Chromebook using the Powerwash feature.
Remember the Power washing permanently erases all the data on your device. As most Chromebook services are cloud-based, still you should make sure you’ve backed up all your data before resetting your Chromebook.
1. First of all, click on the “Status area” at the bottom right of the screen and select “Settings” icon.
2. Now, scroll to the bottom of the page and expand the “Advanced Settings.”
3. Under “Reset Settings, select “Powerwash.”
4. Click on “Restart” in order to confirm the Powerwash.
How to Fix a Chromebook Touchpad Issue
If your Chromebook Touchpad is not working, and not something larger going on with your Chromebook, then you can start troubleshooting the problem. Practice few things to fix the issue:
- Make sure that your Touchpad is dust free. Always keep your Touchpad cleans and do not use the oily hands on your Touchpad. You can use a soft cloth to wipe away any dust or dirt that’s on the touchpad. You can also use a can of compressed air to puff out anything that’s in the cracks or under the Touchpad.
- You should drumroll your fingers on the touchpad for ten seconds. Doing so will cause vibration, which can loosen specks of dirt and jostle the debris out of the way.
- Try pressing the Esc key several times. The Esc key prevents the current page from loading. If something on the website is causing your computer to misbehave or freeze, pressing Esc a few times will stop it and restore normalcy.
- Restart the Chromebook. To do so, press and hold the “Power” button until the Chroebook turns off, give it a full minute and then turn it back on.
- You can try to perform a hard reset. A hard reset of your Chromebook doesn’t affect any files on the pc, but it can resolve several problems. To do so, you need to hold the “Power” button until the Chromebook turns off, then press the “Power” and “Refresh” buttons at the same time to reboot and reset the computer.
- Change the Touchpad settings. Doing so will recover the speed of Touchpad and fix the current issues.
- Update the Touchpad. Updating a touchpad also works in fixing the touchpad issues. You can do so from the “Settings>Touchpad.
- Delete the problem account. Make sure if you have more than one account on a Chromebook, delete the account that’s having the problem or switch to a different account to see if that solves the issues.
Summary
Hey guys! This was the guide about “how to change password on Chromebook.” This article contained the description about the Chrome password and most new features that you can apply to your Chromebook to use most of your laptop.
Hope you find this article helpful and informative. If you’ve any queries regarding this article, please let us know in the comment section. We would glad to answer you!

Secure You PC Now With Award Winning Security.
Protects your PC from viruses, spyware, Trojans and other malicious programs.
 FREE DOWNLOAD
Available in Windows 11, 10, 8, 7, Vista, XP